Monday, October 11, 2010

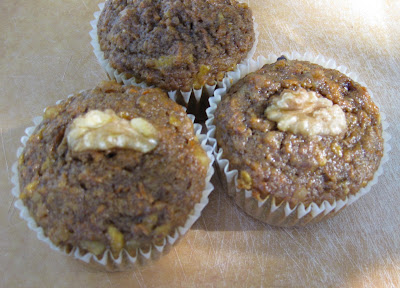
Healthy Carrot Muffins

I recently had a lovely, overdue breakfast with my Nana. We chatted for hours sipping coffee, nibbling fruit, and munching on these muffins. It was so good to have some time with her. Breakfast with Nana is like coming home for me. When I was little, I went to her house every morning before school, and she always made me breakfast. (She had the best toaster.) Carrot cake is Nana's favorite, and so I wanted to bake her some deliciously nutritious carrot muffins. They turned out fantastic. We both loved them, and I will definitely be making these a regular in our house. They're hearty and not too sweet, so they are a great breakfast treat. The nuts are optional, but if it's up to Nana, the more the better! Also, the original recipe calls for wheat germ, but I substituted wheat bran because that's what I had in the pantry. Germ has more protein, and bran more fiber. Choose your own adventure. Speaking of adventures...
Healthy Carrot Muffins
makes 12

3/4 c. all-purpose flour
1/2 c. whole wheat flour
2/3 c. dark brown sugar
2 Tbsp. wheat bran
2 tsp. ground cinnamon
1 tsp. baking powder
1/2 tsp. baking soda
Pinch fine salt
2 large eggs
1/3 c. canola oil
1 Tbsp. pure vanilla extract
3-4 medium carrots, grated (about 2 cups)
1/2 cup grated apple
1/3 c. chopped walnuts, plus a few whole ones for topping

1. Preheat oven to 350 °F. Line twelve 1/2-cup muffin cups with paper muffin liners.
2. Whisk the flours with the brown sugar, wheat bran, cinnamon, baking powder, baking soda, and salt in a medium bowl. In another medium bowl lightly whisk the egg, then whisk in the vegetable oil, and vanilla extract.
3. Quickly and lightly fold the wet ingredients into the dry ingredients with a rubber spatula. Stir in the carrots and pineapple just until evenly moist; the batter will be very thick. Stir in nuts. Divide the batter evenly among the muffin cups, and top each with a whole walnut.
4. Bake until golden and a toothpick inserted in the centers comes out clean, about 25-30 minutes. Turn muffins out of the tins and cool on a rack. Serve warm.

P.S.  Don't tell Dan, but I think I like these better than my banana bread.

Wednesday, October 6, 2010

Gluten-Free Lemon Cream Cheese Cupcakes

I love The Cupcake Station. L-O-V-E, love. Their buttercream is a-maz-ing. To celebrate the Grand Openning of their new Plymouth-far too close for my own good-location, Dan and I got ourselves a little treat. I chose one of my favorites: "Lemon Lust"-lemon cake with lemon white chocolate cream cheese frosting. My gluten-free sister happend to stop by that night, and, with puppy dog eyes, asked if she could just try a bit of the frosting. She too was in love and immediately wanted to make a gluten-free version. Here's what we came up with:

Lemon Cream Cheese Cupcakes
cake adapted from joy of baking
makes 18

1 c. butter, room temperature
1 c. granulated white sugar
4 large eggs
1 tsp. pure vanilla extract
Zest of 1 large lemon (outer yellow skin of lemon)
2 c. Bob's Red Mill gluten gree all purpose baking flour
2 tsp. baking powder
1/8 tsp. salt
1/4 c. fresh lemon juice

1. Preheat oven to 350 °F and place rack in the center of the oven. Line muffin pan with paper baking cups.
2. In the bowl of your electric mixer (or with a hand mixer) beat the butter and sugar until light and fluffy and pale in color (about 3 minutes). Add the eggs, one at a time, mixing well after each addition. Beat in the vanilla extract and lemon zest.
3. Sift together (we didn't) the flour, baking powder and salt and then add to the batter along with the lemon juice. Mix only until incorporated.
4. Pour the batter into the prepared cups, smoothing the top with an offset spatula. Bake about 15-20 minutes, or until a toothpick inserted in the center comes out clean. Place on a wire rack to cool, then gently remove from pan.

Lemon Cream Cheese Frosting

1-8 oz. package cream cheese, softened
1/4 c. (1/2 a stick) butter, softened
juice of half a lemon
finely chopped lemon zest
3-4 c. powdered sugar

1. Beat together the cream cheese and butter until incorporated. Mix in zest and juice.
2. Add sugar in batches, mixing thouroughly after each cup or so.
3. Refrigerate or freeze frosting for 15-20 minutes before piping.

The yellow topping is just a few drops of food coloring whisked into some granulated sugar and sprinkled on top.
These are not exactly light and fluffy. The cake ended up more dense and rich, but still delicious. I think that is due, in part, to the gluten-free flour, and the recipe itself. With 4 eggs, I think the original is leaning more toward a pound cake anyway.

Saturday, October 2, 2010

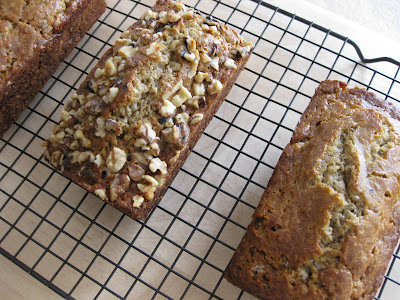
Whole Wheat Banana Bread

We went down to Eastern Market last Saturday and had an awesome lunch with some awesome friends at Russel Street Deli. It was a bit expensive, but my Avocado Melt was worth it.( "It is so choice." ) After lunch, we strolled through the various sheds perusing the produce. I was primarily looking for Michigan grown veggies, but came across a couple of vendors selling bananas at 3 pounds for a $1. Two words. banana. bread. This is my version-with wheat flour and far less sugar-of Mom's old recipes that she got from who knows where. To mash the bananas, I put them in a flat-bottom bowl and use a potato masher just like I do with avocados to make guacamole. It's much easier. And when I don't have an abundance of fresh bananas, I use over-ripened ones that I store in the freezer. Just take them out 30 min to an hour before you plan on mashing them.

Whole Wheat Banana Bread 

1/3 c. butter
1/2 c. sugar
2 eggs
1 1/2 c. mashed banana
1/3 c. water
1/2 tsp. salt
1 tsp. baking soda
1/4 tsp. baking powder
1 c. whole wheat flour
2/3 c. AP flour
1/2 c. chopped nuts (optional)

1. Preheat oven to 350 °F. Grease bottom of loaf pan(s).
2. Mix sugar and butter in a large bowl. Stir in eggs until blended, and add water and bananas.
3. Stir in remaining ingredients except nuts, and mix well. Stir in nuts and pour into baking pan. Or, pour into pan, and sprinkle nuts on top.
4. Bake until toothpick comes out clean and top is golden brown.
     1 hr. 15 min. for 8" pan
     55-60 min. for 9" pan
     40-45 min. for 3 small 6" pans

Friday, September 17, 2010

Sweet Potato and Black Bean Enchiladas

I am often asked how we handle dinner in our house with me being a vegetarian and my husband not. For the most, we primarily eat vegetarian meals that my husband enjoys. (He likes to get meat when we go out for dinner.) Other times we'll cook something on the side for him. It's not that hard with a little planning. For example, if I'm making spaghetti, I'll saute mushrooms for myself, and cook up a sausage for him. Another easy fix are enchiladas. One pan with sweet potatoes, the other with chicken. This recipe is a modification of my chicken enchiladas, and is a result of splitting many ingredients in half. 

Sweet Potato and Black Bean Enchiladas
makes 4 - double for a full batch

1 medium sweet potato, peeled and diced
1 tsp. olive oil
1 tsp. taco seasoning
1/2 of a 14 oz. can black beans
1/2 of a 4 oz. can diced green chilis
1-10 oz. can red enchilada sauce
4 whole wheat tortillas
4 oz. Monterey Jack cheese, shredded

1. Preheat over to 400 °F. Toss sweet potatoes with olive oil and taco seasoning to coat. Place on a sheet pan sprayed with non-stick cooking spray. Roast for 15-20 minutes, stirring once.
2. Meanwhile, combine black beans, green chilis, 1-2 Tbsp. sauce and 2 Tbsp. cheese in a large bowl.
3. Add the roasted potatoes to the black bean mixture and stir to combine. Divide filling among tortillas, roll, and place in a 9 x 9 baking dish. Top with desired amount of sauce, and remaining cheese.
4. Reduce heat to 350 °F and bake 30-40 minutes or until golden brown and bubbly.

Wednesday, September 8, 2010

Greek Quinoa Salad

Dan and I spent our Labor Day weekend at a camp in "Up North," Michigan. Despite the rain, we had a fantastic time with extended family and friends. One of the highlights for me was falling asleep in our cold cabin next to the warm glow and crackling of the fire in our fireplace. For a moment each night, I couldn't help but think of Little House on the Prairie.
Being on a particular diet, the thought of going to a camp where I have no idea what type of food we'll be served is a bit unsettling. I figured there would be salads, potatoes, and some fruits and veggies, but to make sure that I had some good vegetarian protein, I made this salad to take along. It worked out great since there was no cooking or heating necessary. Just pulled the container out of the fridge. I didn't really do any careful measuring so the amounts of vegetables and cheese are approximate. Use more or less as desired.
On a side note, I'm taking another evening class this Fall that meets twice a week, so I planning to make many more main-dish salads like this one that can be eaten on the go.

Greek Quinoa Salad
Salad:
3/4 c. quinoa, rinsed
1 1/2 c. chopped, seedless cucumber
1 c. seeded, chopped tomato
3/4 c. canned chickpeas, rinsed
1/2 c. chopped, blanched zucchini
3 Tbsp. finely chopped onion
1/4 c. diced red (or green) pepper
1/4 c. crumbled feta cheese
Dressing:
3 Tbsp. olive oil
Juice of 1/2 a lemon
1 clove garlic, pressed
salt & pepper

1. Cook quinoa according to package directions and place in fridge to cool. Meanwhile, chop vegetables and set aside.
2. Combine dressing ingredients in a small bowl and whisk to incorporate.
3. In a large bowl, combine cooled quinoa, vegetables, feta, and dressing. Season with extra salt and pepper to taste. Refrigerate in an airtight container for up to 3 days.

Wednesday, August 25, 2010

Quick Black Bean Brownies

If you have never heard of black bean brownies, don't be scared. They taste just like real thing, but with an added nutritional boost and an extra fudgy texture. These are a great way to sneak some vegetables past kids or the vegetably challenged adults we all know and love. There are tons of "from scratch" recipes floating around the web, but this is a quick trick that I heard of by word of mouth over a year ago. Trust me, no one will ever know...unless you tell them.

Quick Black Bean Brownies

1 - ~20 oz. box brownie mix
1 - 14 oz. can black beans

1. Drain beans and rinse well.
2. Put beans back in the can, and fill it up the rest of the way with water.
3. Puree beans and water in a blender until very smooth.
4. In a large mixing bowl, stir together the bean mixture and brownie mix. Pour into a greased 13 x 9 baking dish, and bake according to the package instructions.

Wednesday, July 14, 2010

Can't stop thinking about 'em...

I've updated the cooking directions for the Quinoa-Stuffed Peppers, and because they turned out so well I had to write a special post just to tell you about it. You couldn't even tell that the filling had been frozen for 2 months. I love meals that I can make in large batches and freeze for later. Nothin' like an easy weeknight meal that tastes like you spent hours in the kitchen. Next time, I might even make a double batch and freeze a whole bunch. These will definitely be a regular on our dinner table. Make them. Tonight.

P.S. Get your quinoa from Trader Joe's. From what I've seen, they have the best price around. Unless you buy in bulk, of course...

Thursday, July 8, 2010

Quinoa Salad with Asparagus and Tomato

What I am not going to say again, is that I am sorry for not posting in such a long time. I'm not going to apologize for the craziness that has been my life for the last 2 months, while working full time, and taking a statistics class 4 nights a week. I will however share this delicious salad that I had for dinner the other night. What I will apologize for is the lack a variety in these last 3 posts. Quinoa, then asparagus, then quinoa + asparagus. They're just too delicious, and I have been on a mission the last two weeks to spend as little $$ as possible on groceries, and use up what we have in the pantry and freezer. The exception is fresh produce, which I could never go a week without. Here's the result:

Quinoa Salad with Asparagus and Tomato

For the salad:
3/4 c. quinoa
1 1/2 c. water
1/2 bunch of asparagus cut into 1 inch pieces (about 1 1/2 c.), steamed
1 medium vine tomato, seeded and diced (about 1/2 c.)

Dressing:
1 Tbsp. olive oil
1 Tbsp. lemon juice
1/2 tsp. balsamic vinegar
salt and pepper

1. Using a sieve, rinse quinoa under cold running water.
2. Bring quinoa and 1 1/2c. water to a boil in a medium saucepan. Reduce heat, and simmer for 12-14 minutes or until tender and all of the liquid is absorbed.
3. Meanwhile, whisk together the olive oil, lemon juice, vinegar, and salt and pepper. Set aside.
4. Pour cooked quinoa out onto a large plate to cool (about 10 minutes).
5. In a large bowl, mix quinoa, asparagus, and tomato. Pour dressing over quinoa mixture, and stir to combine.
6. Serve topped with parmesan or feta cheese (optional).

Makes 2-3 entree size portions or 4-6 for a side dish.

Note: If you would like a hot salad, skip the cooling step. Alternatively, if your preference is for a cold salad refrigerate for about 30 minutes before serving. My preparation was served room temperature.
P.S. It's even better the next day! Just put it in the microwave for 30-60 seconds to take the chill off.

Thursday, May 6, 2010

Grilled Asparagus

I was so excited to find some of the first fresh MICHIGAN asparagus in the grocery store the other day. That means that Farmer's Market season is rapidly approaching. I can hardly wait for our first trip. Anyway, this is by far my favorite way to prepare asparagus. Yes, even better than in that pasta. It's so simple, so fresh, and just makes me happy. Remember what I said about grill flavor. I look forward to warm weather vegetable grilling almost as much as kids do the ice cream man.

Grilled Asparagus
There are no real measurements here, just add spices until it "look good," and if your not into spicy, you could substitute paprika for the cayenne pepper, or omit it altogether. 


1 bunch fresh asparagus
2-3 Tbsp. olive oil
sea salt
fresh cracked pepper
garlic powder
cayenne pepper

1. Preheat grill. (I turn our little Weber to medium-low b/c it gets really hot!)
2. In a 13 x 9" baking dish or other shallow pan, whisk together oil and spices. Set aside.
3. Clean, and trim woody ends from asparagus and toss in the oil mixture, coating well.
4. Lay asparagus directly onto hot grill. Turn every couple of minutes until desired doneness, about 10-20 minutes depending on how hot your grill is and the size of the asparagus. If your not particular about presentation, place grilled asparagus back into your olive oil dish. It will only pick up more flavor.

Tuesday, May 4, 2010

Quinoa-Stuffed Peppers

After preparing a lunch-something very similar to this-for a crowd of hungry volunteers, and receiving rave reviews, I was reminded how much joy it brings me to help people get excited about healthy food. A few very satisfied customers made the comment that I "snuck vegetable on them." Yesss! Healthy food truly can be delicious, and it doesn't have to be complicated either. This recipe is a serious veggie sneaker and a crowd pleaser, if you can convince them to try quinoa that is. If you run into that challenge, I don't see why you couldn't substitute brown rice. I always tell curious people that quinoa kinda tastes like brown rice anyway. This recipe makes quite a bit of filling, so be prepared. I made the full batch, filled six pepper halves, and still had plenty leftover for freezing. My only critique of these little masterpieces is that the peppers turned out really mushy far too overdone for our taste. The recipe calls for a full hour in the oven even before topping with cheese. In retrospect, it seems like an awful long time to bake peppers considering that the filling is already cooked. When I pull the leftovers out of the freezer for round two, my plan of attack will be completely different. I plan to grill the peppers for a few minutes, then fill, top with cheese, and place in the oven or broiler just long enough to melt the cheese and create a slight crust on the top. Mmmm...everything is better with a little grill flavor.
Quinoa-Stuffed Peppers
adapted from vegetarian times

1 medium onion, finely chopped (1 cup)
2 Tbsp. olive oil
2 ribs celery, finely chopped (1/2 cup)
1 Tbsp. ground cumin
2 cloves garlic, minced (2 tsp.) - I pressed mine
1 6-oz. package fresh, baby spinach
2 15-oz. cans diced No Salt Added tomatoes, drained, liquid reserved
1 15-oz. can black beans, rinsed and drained
3/4 cup quinoa
3 large carrots, grated (1 1/2 cups)
1 1/2 cups grated pepper Jack cheese, divided
4 large red bell peppers, halved lengthwise, ribs removed.

1. Heat oil in saucepan over medium heat. Add onion and celery, and cook 5 minutes, or until soft. Add cumin and garlic, and sauté 1 minute. Stir in spinach and drained tomatoes. Cook 5 minutes, or until most of liquid has evaporated.
2. Stir in black beans, quinoa, carrots, and 2 cups water. Cover, and bring to a boil. Reduce heat to medium-low, and simmer 20 minutes, or until quinoa is tender. Stir in 1 cup cheese. Season with salt and pepper, if desired.
3. Preheat oven to 350°F. Grease baking dish with cooking spray.
4. Fill each bell pepper half with heaping 3/4-cup quinoa mixture, and place in baking dish. Bake 15 minutes or until peppers just start to soften. Turn Broiler on Low setting. Top each pepper with remaining cheese and broil 5-10 minutes until cheese is a bubbly, golden brown.

Notes:
-The original recipe calls for a 10-oz. pack of frozen spinach, but I really wanted fresh. Your choice. If you do use fresh, it will take longer to reduce the liquid as described at the end of step 1.
-The original also calls for reduced-fat cheese, so if you're watching fat or calories keep that in mind when reviewing the nutrition facts published by vegetarian times.
-As far as the cheese goes, buy a brick and shred it yourself. It's usually cheaper than the pre-shredded stuff in the bags, and it melts and tastes better too.
-I love recipes like this one that give both measurements and quantities. It makes shopping so much easier. I recommend that you do this with your own recipes.
-I was only able to get about 1/2 cup of the quinoa mixture into my peppers, they must have been small.
Enjoy!

*Update*-7/14/10-The cooking times and photo above reflect my changes after round two with the leftovers. They turned out much better this way. The peppers were hot and cooked, but still had a little crunch, and the broiled cheese topping made the dish. Didn't end up grilling...it was rainy. As for the frozen filling, I transferred it from the freezer to the fridge the night before to start the slow thaw, then defrosted/heated it in the microwave before filling the peppers.

Wednesday, March 31, 2010

Elvis Oatmeal

Long time no blog! I'm here, and we are still eating, just not anything terribly exciting. (Though I do have a few backlogged items that I'll get to ASAP.) Dan got a new job 4 weeks ago teaching Middle School social studies at a charter school, which has proved to be a very challenging task. He has spent countless hours toiling at the computer leaving me with almost all of the housework, zero computer time, and a lot less sleep. I been so tired and lacking any serious motivation, but we're adjusting and getting used to things now, and I'm regaining my zeal for the hunt...for recipes! Last week I discovered a new blog (Kath Eats Real Food) that became an instant favorite. The author is my age, an RD student, and is devoted to healthy eating. I love it. She takes her oatmeal very seriously, and inspired me try something new. I already eat oatmeal for breakfast at least 4 times a week, so this simple modification was the perfect way to ease back into my culinary creativity. I have been trying to find ways to incorporate a wider variety of seeds, grains, and nuts into my diet and oatmeal is the perfect vehicle, especially when topped with Trader Joe's Valencia Peanut Butter with Roasted Flaxseeds, which I discovered on my last trip. Since PB is another staple in the Amy diet-I don't know what I would do if I had a peanut allergy-I can kill two birds with one stone (not that I'd want to). I highly recommend this product as a baby step into the world of flax seeds, since they are deliciously coated in healthy, natural peanutty goodness.

Elvis Oatmeal
inspired by KERF

For 1 smallish serving:

1/3 c. quick cooking oats
1/3 c. water
1/3 c. organic, skim milk
1/2 of a medium banana, mashed
1 tsp. mini chocolate chips
brown sugar
peanut butter

1. Combine water and milk in a small sauce pan and bring to a simmer over medium heat.
2. Stir in oats and cook for 1-2 minutes. Add mashed banana and cook for an additional 2-3 minutes or to desired consistency.
3. Serve topped with a dollop of peanut butter, sliced banana, chocolate chips, and a sprinkle of brown
sugar. 
So filling I couldn't even finish the bowl.

Wednesday, March 3, 2010

Mexican Breakfast with Tomato Avocado Salsa

This is one for the rotation. I want to eat it everyday. We were literally head-over-heels in love at first bite, and...it's a complete meal. Not a side, not a dessert as I seem to have been making these days. However, the following is more of a guide than a recipe, a little of this a little of that-I warned you. This "guide" was adapted from a cookbook (more on that later) that I got for Christmas and have been dying to use. This dish just makes me even more excited to try more. Think a cleaner, brighter, simpler huevos rancheros. The salsa was the key; my own, crazy simple, yet euphoria-inducing little concoction. Instead of a rich tomato and onion stew-like sauce, the salsa brings a fresh flavor to the mix, the best part being the major kick of lime.

Mexican Breakfast
adapted from The Family Chef, the recipe titled:
"jill's favorite mexican breakfast"

4 corn tortillas
canola or peanut oil for frying
1 c. black beans (from a can), drained and rinsed
cumin
garlic powder
salt and pepper
1 c. shredded cheese - we used a combo of colby-jack and cheddar
4 eggs, fried, poached, basted, scrambled whatever you prefer

1. Prepare the salsa (recipe below). Set aside.
2. Preheat a tablespoon or two of oil in a skilled over medium-high heat. You can test the oil by putting a strip of tortilla in it. Once it sizzles and bubbles, the oil is hot enough. Fry one tortilla at a time until golden brown and crispy. Remove tortilla from the pan and place on a plate or cookie sheet lined with paper towels.
3. In a microwave-safe bowl, season the beans to taste with a sprinkle of cumin, garlic powder, salt and pepper and smash them up with a fork or potato masher. Microwave for 30 seconds to 1 minute until hot. (You can do this on the stove too, but I was trying to save a little time.)
4. Divide the crispy tortillas onto plates. Spread 1/4 c. of beans on each tortilla. Add cheese, dividing evenly.
5. Place one egg on each tortilla. The heat from the eggs and beans will melt the cheese.
6. Top each one with a spoonful of salsa. Enjoy!
Serves 2-4

Tomato Avocado Salsa

1 avocado, diced
2 tomatoes, seeded and diced
1 clove garlic, crushed
the juice if 1/2 a lime
onion powder and salt and pepper to taste

I cut into this one, but Dan likes to pick them up like a piece of pizza.

Sunday, February 28, 2010

Product Review: Whole Foods' 365 Gluten-Free Baking Mix


This is the first of maybe a couple, maybe many, product reviews. I decided to do this for the simple reason that when I find something good, I want you to know about it. This month, I made a batch of Valentine Swedish Butter Cookies for the gluten-challenged members of my family who seriously miss having them at Christmastime. The cookies turned out great. They were a bit more crumbly than those made with wheat flour, but there was no compromise in flavor. Plus, you can't beat the conveniece of an all-in-one mix. If you are familiar with gluten-free baking, you know the time, effort, and money involved in finding all of the ingredients required for recipes like this one. This 16 oz. package was about $4 and contained exactly, and I mean exactly, the amount necessary a single batch. After measuring out what I needed for the dough, there was still a bit left in the bag for rolling and cutting. The only drawback was that the dough got super hard in the fridge, and needed some serious kneading before I could even think about rolling it. Overall, I give it a 5-star rating. Take that for what it's worth considering that this is the first batch of gluten-free cookies I have ever made. : )


Oh, and the frosting was the perfect use for that pink, gel food coloring I had sitting in my cabinet after the Red Velvet craziness.

Sunday, February 14, 2010

Rosemary Roasted Potatoes

I have been roasting potatoes for a while. Get a few Idaho baking potatoes, dice them up, give 'em a toss in some oil and sprinkle with any combination of herbs and spices. Super easy and pretty delicious. But, when I came across the cute little container of baby gold (Yukon Gold) potatoes in the produce section I was inspired to put a twist on the old staple. Gold potatoes have a distinctly creamy, buttery flavor that other starchy and waxy potatoes lack, and the cute little baby ones are sweeter too. Try them, try them Sam I am! (Dr. Suess' b-day is just around the corner.)
Rosemary Roasted Potatoes
barely adapted from Ina Garten

I whisk the olive oil and spices together in a bowl before prepping the potatoes. This way the garlic and rosemary can begin to infuse the oil with their flavor. I would definitely recommend doing this if you use dried rosemary, as I did. The addition of the red pepper flakes gives it just a hint of heat.

1 1/2 pounds baby gold potatoes
2 Tbsp. good olive oil
3/4 tsp. sea salt
1/2 tsp. freshly ground black pepper
1 Tbsp. minced garlic (3 cloves)
2 Tbsp. minced fresh rosemary leaves or 2 tsp. dried
1/4 tsp. red pepper flakes

1. Preheat the oven to 400 °F.
2. Cut the potatoes in half or quarters and place in a bowl with the olive oil, salt, pepper, garlic and rosemary; toss until the potatoes are well coated. Dump the potatoes on a baking sheet and spread out into 1 layer; roast in the oven for at least 1 hour, or until browned and crisp. Flip twice with a spatula during cooking to ensure even browning.
3. Remove the potatoes from the oven, season to taste, and serve. 

Besides using baby golds, I am pretty sure these taters came out better than any previous batches because I never cooked them long enough and I used to use a glass 13" x 9" pan. Roasting in a glass pan? I know, I know...

Saturday, February 13, 2010

Coleslaw with Citrus Vinaigrette

I seem to get asked all kinds of weird questions about food. "Do you want a cabbage?" was a new one. A friend accidentally purchased a green cabbage mistaking it for a head of iceberg lettuce, and had no use the the crucifer. So I took it (a. because I didn't want it to go to waste, and b. it gave me a chance to be creative with something I had no intention of cooking with anytime soon), and made this lovely salad for the Superbowl party that we would both be attending. I don't know about anyone else, but we certainly enjoyed it-by the plateful. The dressing is a slight adaptation of a recipe from Bahama Breeze, one of our favorite restaurants. I just love it when restaurants post recipes on their websites and they have a bunch. There are however two different recipes on their site for "Citrus Vinaigrette," but I chose this one because I already had all of the ingredients and I thought it would be better for a coleslaw. The other one calls for creole seasoning, a flavor I really wasn't looking for for this.
Coleslaw with Citrus Vinaigrette
by me, with some help from Bahama Breeze

Coleslaw

1 green cabbage, shredded
3 c. shredded red cabbage, most of a 10 oz. package
2 carrots, grated
1-1/2 c. diced red pepper
4-5 green onions, finely chopped, about a 1/2 c.

Citrus Vinaigrette

1/2 c. White Wine Vinegar
1/4 c. Orange Juice, fresh squeezed
1 Tbsp. Lemon Juice, fresh squeezed
1/4 c. Extra Virgin Olive Oil
1 Tbsp. Mustard
1 Tbsp. Fresh garlic, minced
1-1/2 tsp. granulated sugar
1 Tbsp. Brown Sugar
1/4 tsp. Salt & Black Pepper, fresh ground

1. Combine vegetables in a large bowl.
2. To make the dressing, combine all of the ingredients in a blender and process until thoroughly blended.
Vinaigrette can be made a day in advance and kept refrigerated.
3. Dress the coleslaw and store in the refrigerator until ready to serve.

This was much better the next day after the cabbage had a chance to soak up the dressing and soften up.

Monday, February 8, 2010

Whole-Wheat Oatmeal Pancakes

Well can't you see that it's just raining
there ain't no need to go outside...
But Baby, You hardly even notice
when I try to show you
this song is meant to keep ya
from doing what you're supposed to
like waking up too early
Maybe we can sleep in
I'll make you banana pancakes
pretend like it's the weekend now
-"Banana Pancakes" by Jack Johnson

These lyrics swim around my head every time I make pancakes for a weekend breakfast. I highly recommend sleeping in and making these pancakes. They turned out to be exactly what I was hoping for. Simple, comforting flavors, incredibly delicious, and healthy. I wouldn't change a thing! The extra prep time soaking the oats is well worth it, and gives you time to slice up some bananas or strawberries or pour yourself another cup of tea-which I am developing a particularly obsessive habit of.
soaking oats
Whole-Wheat Oatmeal Pancakes
swiped from Gourmet

3/4 c. quick-cooking oats
1 1/2 c. plus 2 tablespoons well-shaken, low-fat buttermilk, divided
3/4 c. whole-wheat flour
1 1/2 tsp. baking powder
3/4 tsp. baking soda
1/2 tsp. cinnamon
1/8 tsp. grated nutmeg
1/2 tsp. salt
1 large egg, lightly beaten
2 Tbsp. unsalted butter, melted
1 Tbsp. packed brown sugar
Accompaniment: sliced bananas (Yes, please!!!)

1. Soak oats in 3/4 cup buttermilk  for 10 minutes.
2. Meanwhile, whisk together flour, baking powder, baking soda, cinnamon, nutmeg, and salt in a large bowl.
3. Stir egg, butter, brown sugar, remaining 3/4 cup plus 2 tablespoons buttermilk, and oat mixture into dry ingredients until just combined.
4. Heat a griddle over medium heat until hot and lightly brush with oil. Working in batches, pour 1/4 cup batter per pancake onto griddle and cook until bubbles appear on surface and undersides are golden-brown, about 1 minute. Flip with a spatula and cook other side, about 1 minute more. (Lightly oil griddle between batches.)

In addition to bananas, we had sausage with our pancakes. "Hot and Spicy" pork sausage for Dan and MorningStar veggie sausage patties for me, which I tried for the first time, and also highly recommend especially since they're wrapped perfectly in little 2 packs.  Please, try these pancakes. You won't be disappointed and you'll want to have them at your next brunch or even for a quick dinner.

Monday, February 1, 2010

Fattoush

In college, especially my first 2 years, I wasn't exactly what you'd call a "joiner." I would drive out to school, go to class, maybe the library, and then head home. There was, however, one event that I made sure never to miss: Global Fest. It was a day long celebration of world cultures through the arts and food. Each student organization would plan a demonstration or display and provide a variety of foods. As you might imagine, the food lines went out the door. There was so much food it was incredible. We had tacos and quesadillas from the Spanish Club, quiche, brie, and escargot from the French Club (which I joined later), along with chow meins, fried rice, curry, kabobs, falafel, hummus-you name it. It was my first real exposure to Middle Eastern cuisine, and I have not been able to get enough since. Dan and I would routinely order carry-out after class, and a fattoush salad was almost always part of the order. Now I make it myself from time to time because it's just so easy there is no reason not to. The only special ingredient you may not already have is the sumac, which can be found in specialty markets, some well stocked grocery stores, and online from suppliers or cool little stores like Penzey's.

Fattoush
adapted from an unknown source, and not very exact at that

Salad:
4 c. chopped romaine lettuce, about 1 small head
1 seedless, english cucumber, chopped
2-3 roma or vine ripened tomatoes, chopped
1/2 c. finely chopped parsley
2-4 green onions finely sliced
3/4 to 1 tsp. ground sumac
2 pieces of pita bread - we used whole wheat here
1/2 green pepper, chopped (optional)
Dressing:
3 Tbsp. olive oil
3 Tbsp. fresh lemon juice
1 clove garlic, crushed
salt and pepper

1. Preheat oven to 350 °F. Break pita bread into small pieces and place on a baking sheet. Bake for about 5 minutes or until lightly toasted and the edges are golden brown.
2. In a large bowl, mix salad ingredients with toasted pita.
3. In a small bowl, whisk together the oil, lemon juice, and garlic. Season to taste with salt and pepper. Pour over salad and serve immediately.

This recipe makes a conservative amount of dressing. We don't like our salads dripping with dressing. I have even made it with only 2 Tbsp. each of oil and lemon juice. So feel free to scale it up a bit with 1/4 to 1/2 c. of each. This salad is also exceptionally delicious topped with crumbled feta cheese.

Monday, January 25, 2010

Homemade Barbeque Sauce

This is an easy no-frills barbeque sauce that is super quick to make and would be good with just about anything you're grillin' or dippin'. Other than being a cheaper alternative to the store bought variety, I use organic ketchup, so it doesn't contain any high fructose corn syrup (evil!), fillers, or preservatives you can't pronounce. Plus, organic ketchup is thicker and way more flavorful than the regular national brands. I like Trader Joe's, but Heinz or the store brand are good too. This is by no means an exact recipe. Taste as you go and season to your liking.

Barbeque Sauce
heavily adapted from cooks.com

1/2 c. orgainc ketchup
1 Tbsp. yellow mustard
1 Tbsp. Worcestershire sauce
1/3 c. brown sugar
1-2 Tbsp. honey
juice of half a lemon
a pinch to 1/8 tsp. cayenne pepper - depending on how spicy you want it
1/4 tsp. fresh ground black pepper
1-2 Tbsp. water (optional)

Combine ingredients in a small sauce pan. Bring to a simmer over low heat and cook 5-10 minutes.

Saturday, January 23, 2010

Chocolate Stout Cake - a little slice of heaven

This is one of those recipes that I came across on Smitten many months ago, printed it, bookmarked it, and decided that someday I needed to make it. Why? It's chocolate, more chocolate...and beer, stout no less, what could be better with chocolate. If you really have to ask, just don't bother. Plus, it was a fabulous way to use the new bundt pan that I got for Cristmas (Thanks, Mom!). As my favorite 6 year old says of Rice Krispies Treats, this cake is "redikalous good." The hint of coffee in the ganache is perfect. But now we're wondering how much more amazing it could be with this tasty brew. Unfortunately, I don't have a decent picture to share partly due partly to my poor kitchen lighting and the fact that I was so darn impatient and turned it out of the pan too early. It was in 2 pieces. Not my best work. See...

Check out the link below for Deb's stunning presentation. Half of mine kinda looked like that, but without the almonds. I will be making it again soon though, for St. Partick's day for sure, if not sooner and hopefully without the mishap.

Chocolate Stout Cake
as adapted by Smitten Kitchen

1 c. stout (such as Guinness)
1 c. (2 sticks) unsalted butter
3/4 c. unsweetened cocoa powder (preferably Dutch-process)
2 c. all-purpose flour
2 c. sugar
1 1/2 tsp. baking soda
3/4 tsp. salt
2 large eggs
2/3 c. sour cream
6 oz. semisweet chocolate chips
6 Tbsp. heavy cream
3/4 tsp. instant coffee granules

1. Preheat oven to 350 °F. Butter or spray a bundt pan well; make sure you get in all of the nooks and crannies. Bring 1 cup stout and 1 cup butter to simmer in heavy large saucepan over medium heat. Add cocoa powder and whisk until mixture is smooth. Cool slightly.
2. Whisk flour, sugar, baking soda, and salt in large bowl to blend. Using electric mixer, beat eggs and sour cream in another large bowl to blend. Add stout-chocolate mixture to egg mixture and beat just to combine. Add flour mixture and beat briefly on slow speed. Using rubber spatula, fold batter until completely combined. Pour batter into prepared pan. Bake cake until tester inserted into center comes out clean, about 35 minutes. Transfer cake to rack; cool completely in the pan, then turn cake out onto rack for drizzling ganache.
3. For the ganache, melt the chocolate, heavy cream, and coffee in the top of a double boiler over simmering water until smooth and warm, stirring occasionally. Drizzle over the top of cooled cake.

Saturday, January 16, 2010

Turkey Sausage and Broccolini Ravioli

One of our favorite restaurants is an Italian place in Ann Arbor, where the bruschetta is amazing, and so is the Veggie Lasagna. It's very easy to be a member of the Clean Plate Club at that place. For a while, one of their dishes was my favorite meal anywhere. "Broccolini and Italian sausage stuffed ravioli with cream tomato sauce." It makes my mouth water just thinking about it. Some time ago I decided that I was going to attempt to make it myself, but never found a day when I could spend the entire day in the kitchen making pasta dough and filling ravioli. I remember making fresh pasta with my great-grandfather as a kid so I was convinced that I could do it myself. I was also under the impression that someone in our family had Grandpa's old pasta machine, but no such luck. If it's around, it's burried somewhere. Then I came across the short-cut of using wonton wrappers. It still seems like a cop-out to me, but if Giada can do it, then they're good enough for this Polish-Irish-American girl.
Turkey Sausage and Broccolini Ravioli
Yields about 30 ravioli 

3 Italian turkey sausages with the casings removed or about 3/4 lb. loose
2 Tbsp. olive oil
1 clove garlic, crushed
1/4 tsp. red pepper flakes
1/4 tsp. rubbed sage
1/2 c. broccolini, chopped small
1 egg, beaten
1/4 c. parmesan cheese
1 package wonton wrappers (about 60 each)

1. Heat oil in a skillet over medium heat. Add garlic, red pepper, sage and sausage. Cook until sausage just starts to brown and is cooked through.
2. Transfer sausage mixture to a large bowl and set aside. Add broccolini to the pan and sautee for 2-3 minutes.
3. Add broccolini, egg, and parmesan to the sausage and mix well.
4. Set wontons out on your work surface in a single layer. Drop tablespoons of the sausage mixture in the center. Using your finger wet the outer edge of the wonton, place another wrapper on the top and firmly press the layers together whithout creating air pockets. Use a biscuit cutter to cut off some of the excess and place on a cookie sheet. Continue making ravioli with the remaining ingredients.
5. Bring a large pot of water to a low boil. Add ravioli in batches of about 5-6 at a time, and boil for 3-5 minutes until wontons are soft.
6. Serve immediately with your favorite sauce. (We used a basil marinara.)
These turned out awesome! It was exactly the flavor combo that I was hoping for. Broccolini is sweeter and more tender than regular broccoli which pairs well with the spicy sausage. You can find it in most grocery stores, but it's often called "baby broccoli" or "aspirations", as it was in my store, because some people think it tastes like a cross between broccoli and asparagus. The wonton wrappers are definately more delicate than an egg pasta dough so the dish ends up lighter than traditional Italian ravioli, but with great flavor. Because they are delicate you have to be careful not to over cook them or they'll tear right in the pot.

Monday, January 11, 2010

NYE Pizza


My veggie masterpiece
What better way to ring in the new year than with a "make-your-own" pizza party. It's especially nice to have homemade pizza when you have a professional living with you. My husband worked at a couple different pizza joints for a total of nine years! So I, of course, leave the dough making to him. He found a new recipe and it worked well with both bread flour and whole wheat flour. It was both delicious and easy to make-as far as I can tell. We had a plethora of toppings including: sausage, pepperoni, peppers, garlic, spinach, basil, tomato, onion, jalapeno, and some mushrooms that I sauteed ahead of time in a bit of olive oil, garlic, and white wine...delicious.


Dan's pizza during construction
and now, here's Dan with the recipe...

Pizza Dough
adapted from Tyler Florence

1 packet yeast (quick rise or dry active, your choice determines how long the water needs to activate)
1 tsp. sugar
1 c. warm water
1 Tbsp. salt
3 c. bread or whole wheat flour
olive oil
cornmeal

1. In the bowl of a standing electric mixer fitted with a dough hook, combine the yeast, sugar, and warm water; stir gently to dissolve. Let the mixture stand until the yeast comes alive and starts to foam, about 5 to 10 minutes.  (I had 3 packs of quick rise and one of dry active yeast.  I didn't give the batch with the dry active enough time to fully activate which resulted in less rise.  Make sure you give it enough time!)
2. Turn the mixer on low and add the salt and 2 tablespoons (a little more never hurt) of olive oil. Add the flour, a little at a time, mixing at the lowest speed until all the flour has been incorporated. When the dough starts to come together, increase the speed to medium; stop the machine periodically to scrape the dough off the hook. Get a feel for the dough by squeezing a small amount together: if it's crumbly, add more water; if it's sticky, add more flour - 1 tablespoon at a time. Mix until the dough gathers into a ball, this should take about 5 minutes.
3. Turn the dough out onto a lightly floured surface and fold it over itself a few times; kneading until it's smooth and elastic. Form the dough into a round and place in a lightly oiled bowl, turn it over to coat. Cover with plastic wrap or a damp towel and let it rise in a warm spot, i.e. over a gas pilot light, until doubled in size, about 1 hour.  (Seeing that our oven/stove is electric we have to use the oven to create a warm environment.  I like to heat the oven to its lowest setting and then turn it off when I put the dough in there. This is kind of a bummer because we weren't able to preheat the pizza stone until all of the dough was done proofing.)
4. Once the dough is domed and spongy, turn it out onto a lightly floured counter. Roll and stretch the dough into a cylinder and divide into 3 equal pieces. Cover and let rest for 10 minutes so it will be easier to roll out.  (On this particular occasion I spread some olive oil on a cookie sheet, put all of the dough balls on there and then placed it in the fridge until we were ready to start.)
5. Preheat oven to 500 °F if using a pizza stone, or 425 °F for a cookie sheet, but unlike the stone, do not put the cookie sheet in the oven while preheating. Roll or pat out a piece of dough into a 12 inch circle, about 1/8-inch thick. Dust a pizza paddle or cutting board with cornmeal and slide it under the pizza dough. Add your favorite toppings. Slide the pizza onto the hot stone (or place pizza on a cookie sheet) in the oven and bake for 12 to 15 minutes, until the crust is golden and crisp. Repeat with the remaining dough.

Saturday, January 9, 2010

Cheddar Cheese and Red Bell Pepper Strata


2 posts in 1 day? Inconceivable!
Here is another red and green thing that I made over the holidays. Apparently I was subconciously festive the entire week. The motivation for this one was to have a nice breakfast or brunch when we woke up. It smelled awesome in the oven, but again left something to be desired. This is one of the few strata recipes I have come across that does not say to refrigerate (I always want to put a "D" in that word) it overnight. We did and it was mushy. Too mushy for Dan to even eat. I made him some scrambled eggs and put this back in to oven to bake a little longer for myself. It did dry out some more, but maybe I shouldn't have let it soak so long, or reduced the amount of milk. The flavor was great though, so I'll give it another try.

Cheddar Cheese and Red Bell Pepper Strata
adapted from Bon Appetit via epicurious
The cooking time below includes the additional baking.

1 1/2 tablespoons butter
1 large (or 1 1/2 smaller ones) red bell pepper, thinly sliced
1 cup chopped green onions
6 slices whole wheat bread
1 1/2 c. grated medium cheddar cheese
1/4 c. grated parmesan cheese
2 cups whole milk
3 large eggs
2 tsp. yellow mustard
1/2 teaspoon dry mustard
1/2 teaspoon salt
1/4 teaspoon pepper

1. Melt butter in large skillet over medium-high heat. Add bell pepper to skillet and sauté until just tender, about 4 minutes. Mix in green onions; sauté 1 minute longer. Remove from heat.
2. Cut bread into 1/2-inch pieces. Layer half of bread in 8 x 8 x 2-inch glass baking dish. Cover with half of cheese, then half of bell pepper mixture. Repeat layering with bread, cheese and bell pepper mixture. Beat milk, eggs, mustard, dry mustard, salt and pepper in medium bowl to blend. Pour over strata.
3. Refrigerate overnight.
4. Preheat oven to 350 °F. Bake strata until lightly browned on top and set in center, about 50-65 minutes. Let stand 10 minutes; cut into squares.

Sweet Potato Pancakes with Guacamole


I have to be honest, these were just alright. Alright by themselves, and decently good topped with guacamole. The combination is odd in a good way. They would probably be better as a side dish or appetizer instead on making them your entire meal like I did. I first saw this recipe while flipping through the channels sometime in December and stopped, of course, on the Food Network and 30 Minute Meals. I thought to myself  "I love sweet potatoes! What a great/different/not too sweet way to make 'em. I'm gonna make those over my break." So I got all of the ingredients and proceeded to prepared the semi-time consuming recipes. Having never made potato pancakes of any kind, or homade hashbrowns for that matter, I was surprised at how hard it is to shred potatoes, especially sweet potatoes, which have very low moisture content. Upon the initial tasting I was thinking that I would never make them again, but now I feel diferently. I think that they would be better with a better sweet potato. Mine was not very dark in color so it probably wasn't as sweet as it could have been. I did cut back on the spices compared to the original recipes only because I thought it seemed like a lot. Also, I just made my own guac rather than following Rachel's recipe. I was not feeling the pomegranate syrup.

Sweet Potato Pancakes
adapted from Rachel Ray
Many reviewers of this recipe complain that their pancakes fell apart. I formed the pancakes in my hand pressing them tightly together and squeezing out any extra liquid before putting them into the oil, and used a small flexible turner to flip them. They are pretty fragile when cooking, but if you are careful you shouldn't have any problems.

about 2/3 cup canola oil, for frying
1 medium Idaho potato, peeled and shredded
1 large sweet potato, peeled and shredded
1 small onion, peeled
1 egg, beaten
3 Tbsp. all-purpose flour
1 Tbsp. chili powder
1 tsp. paprika
1 tsp. ground cumin
1 tsp. coriander
salt and pepper

1. Heat enough oil to just cover the bottom of the pan over medium to medium-high heat.
2. Drain the shredded potatoes, pressing them down in a colander to get their moisture out. Place the potatoes in a bowl; using a box grater, grate the onion directly into the potatoes so that the onion juices fall into bowl as well. Add the egg and flour to the potatoes and onion then season with spices and salt and pepper. Stir to combine.
3. Drop enough batter into hot oil to make 2 1/2-inch pancakes. Add more oil, as needed, and fry cakes in batches until deeply golden on each side.
You will get about 16 pancakes. Drain cooked cakes on paper towels.

Guacamole
I never go by a recipe when I make guac. It's one of those things that I just eyeball and taste, so it ends up a bit different every time. This is what went in this time a round...sadly without onion (the husband's request).

2 ripe Hass avocados
1 roma tomato, finely chopped
1/2 a jalepeno, finely diced - use membranes and seeds to achieve desired heat
the juice of 1/2 a lemon - I prefer a lime, but we were out
1 clove garlic, crushed
salt and pepper

1. Cut the avocados in half, all the way around the pit. Remove the pit with a spoon or sharp knife, then scoop the flesh into a bowl and add the remaining ingredients.
2. Mash until smooth. Taste and reseason, if necessary.

I like to make my guacamole in a bowl with a flat bottom and use a potato masher to mash all of the ingrediants together. It's much easier than using a fork and yields a more uniform consistency.


Tuesday, January 5, 2010

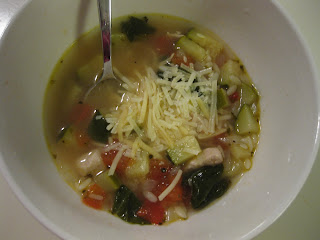
Vegetable Lover's Chicken Soup


T'was the day after Christmas and all through the house, the in-laws were stirring with hungry mouths. So I whipped up some soup just as quick as a flash, and we all settled down for a midday... meal (nothing rhymes with flash).  OK. I'm done. Anywho, after many days of cookie binges, a soup and salad lunch was the prefect way to feed a family of hungry people without contributing to our mutual malaise. I served my Taco Soup, Smooth Vegetable Soup, both of which I had in the freezer, and this new one. It's simple, but in my opinion way better than your average chicken noodle. Not that I have anything against egg noodles and carrots, but it's been done...a lot. The wine adds depth to the flavor and makes it seem like something special, and the red and green vegetables, or should I say fruits, make it rather festive for the holidays.

Vegetable Lover's Chicken Soup  (or Italian Chicken Soup as I have been calling it)
adapted from Eating Well

1-2 Tbsp. olive oil
2 large boneless, skinless chicken breasts cut into small pieces
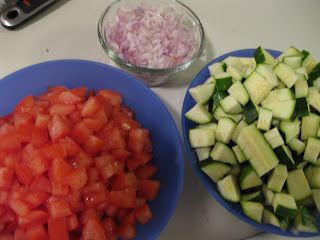
3 small zucchini, finely diced
2 shallots, finely chopped
3 roma tomatoes, chopped
3 cans (14 oz.) low-sodium, fat free chicken broth
1 heaping tsp. Italian seasoning
salt and pepper
3/4 dry white wine (I used Chardonnay)
1 1/2 c. water
3 c. packed baby spinach
1/2 c. orzo pasta
grated parmesan cheese

1. Heat oil in a large saucepan over medium-high heat. Add chicken and cook, stirring occasionally, until browned, 3 to 4 minutes. Transfer to a plate.
2. Add zucchini, shallot, Italian seasoning, salt and pepper and cook, stirring often, until the vegetables are slightly softened, 3 to 4 minutes. Add tomatoes, broth and wine; increase heat to high and bring to a boil, stirring occasionally. Reduce heat to a simmer and cook for about 10 minutes. Stir in spinach, the cooked chicken and any accumulated juices from the chicken; cook, stirring, until the chicken is heated through, about 2 minutes. Serve topped with parmesan cheese.

The original recipe says to add the orzo in with the tomatoes, broth, and wine. I chose to cook it seperately in order to keep the recipe gluten-free. Plus, having the pasta seperate prevents any leftovers from having overly bloated, saggy, chunks that look vaguely like noodles. Just add a spoonful to each portion as desired.

Monday, January 4, 2010

Cookie Day 2009

This is very overdue. My holiday backlog continues to grow...so look for many new posts this week.

For the past 4 years a dear friend and I have come together to make Christmas cookies...for the masses. Cookie Day, or Cookie Hell as we refer to it, should be considered an olympic event, much training and preparation lead up to this day. We make the traditional decorated butter cookies along with 9 others. Yes, a total of 10 (!) different kinds of cookies all in one day, and to make matters worse, we double almost every recipe. Why do we do this? Well, we love cookies, the making, the baking, the gifting, and, of course, the eating. It has changed locations a few times, as we have moved over the years, but for now its at my place, since I have more counter space. We do miss baking at my parents house with their awesome "Speed Bake" oven feature that allows you to evenly bake up to 3 tray of cookies at one time! Someday, when I have a home of my own, I might have to invest in this type of oven even if we use it only one day a year.
We made record time this year. From start to finish, and that includes clean-up, we were done in about 11 hours, and it usually takes well over 12.


Swedish Butter Cookies
a family recipe
I have tried many different sugar/butter cookies, but these are fabulous, even after a couple weeks.
Combine in a large bowl:
3 c. flour
1/4 tsp. salt
1 tsp. baking powder

Mix in a small bowl:
1 c. (2 sticks) butter
1 c. sugar
1 egg
1 tsp. vanilla extract

Add contents of small bowl to large bowl. Mix/knead thoroughly. Wrap in wax paper, chill overnight. Roll and cut. Bake 11 minutes at 375 °F on an ungreased cookie sheet. Allow to cool completely before frosting. Store in an airtight container.

Frosting:
1 tsp. vanilla
3 Tbsp. milk
1/2 c. (1 stick) butter
1 box* powdered sugar

Beat until peaks stiffen. Frost and decorate as desired.
* "box" is what was listed on the original, very old, recipe. We think it was a 1 pound box.

Chinese New Year Cookies
another family thing, my Mom made them every year growing up

1 bag (11 oz.) semi-sweet chocolate chips
1 bag (11 oz.) butterscotch chips
1 can (12 oz.) spanish peanuts
1 can (5 oz.) chow mein noodles
sprinkles (optional)

Melt chocolate and butterscotch chips in a large pot on the stove over low heat. Once melted, add noodles and peanuts. Stir to coat, and remove from heat. Drop heaping tablespoonfuls of mixture onto sheets of wax paper. Top with sprinkiles, if desired, and allow to cool and harden for several hours or overnight. Store in an airtight container.

Peanut Butter Blossoms
from Hershey's

48 Hershey's Kisses
1/2 c. shortening
3/4 c. creamy peanut butter
1/3 c. granulated sugar, plus a few tablespoons
1/3 c. packed light brown sugar
1 egg
2 Tbsp. milk
1 tsp. vanilla extract
1 1/2 c. all-purpose floour
1 tsp. baking soda
1/2 tsp. salt

1. Heat oven to 375 °F. Remove wrappers from chocolates.
2. Beat shortening and peanut butter in a large bowl until well blended. Add 1/3 c. granulated sugar and brown suger; beat until fluffy. Add egg, milk and vanilla; beat well. Stir together flour, baking soda and salt; gradually beat into peanut butter mixture.
3. Shape dough into 1-inch balls. Roll in extra sugar; place on ungreased cookie sheet.
4. Bake 8 to 10 minutes or until lightly browned. Immediately press a chocolate into center of each cookie; cookies will crack around the edges. Remove from cookie sheet to wire rack. Cool completely.
Makes about 4 dozen.

Ginger Snaps
source unknown
This year, these were my favorite, and I ate far too many! I love how they are tough and chewy and seem to bite you right back. To achieve the star pattern, gently press an astersik (*) pattern into the balls of dough with a table knife before baking.

3/4 c. shortening
1 c. brown sugar
1/4 c. molasses
1 egg
2 1/4 c. all-purpose flour
2 tsp. baking soda
1/2 tsp. salt
1 tsp. ground ginger
1 tsp. cinnamon
1/2 tsp. ground cloves
granulated sugar

1. Cream shortening, brown sugar, molasses, and egg until fluffy.
2. Sift together flour, baking soda, salt, ginger, cinnamon, and cloves; stir into molasses mixture.
3. Form into small balls and roll in sugar. Place 2 inches apart on a greased cookie sheet.
4. Bake at 375 °F for 12 minutes.
Yield 5 dozen

Cinnamon Cookies
adapted from a recipe by Diana Rattay, About.com

2/3 c. butter
1 c. sugar
1 egg
1 tsp. vanilla extract
1 1/3 c. all-purpose flour
1 tsp. baking powder
1 tsp. cinnnamon
1/2 c. finely chopped walnuts (or pecans)
2 Tbsp. ground cinnamon
2 Tbsp. granulated sugar

1. Cream butter and sugar until light and fluffy. Beat in egg and vanilla.
2. Sift flour with baking powder and 1 tsp. cinnamon; add to butter mixture and blend well. Chill dough for 30 minutes.
3. In a wide shallow bowl, combine chopped nuts with 2 tablespoons cinnamon and 2 tablespoons sugar. Form chilled dough into small balls; roll each ball in cinnamon sugar nut mixture and place on a greased cookie sheets 2-3 inches apart.
4. Bake at 350 °F for about 10-12 minutes.
Makes 3 dozen.

Oatmeal Scotchie Bars
from Nestle's Very Best Baking
We usually make the cookie form, but bars were a nice alternative, and saved some baking time.

1 1/4 c. all-purpose flour
1 tsp. baking soda
1/2 tsp. salt
1/2 tsp. ground cinnamon
1 c. (2 sticks) butter
3/4 c. granulated sugar
3/4 c. packed brown sugar
2 large eggs
1 tsp. vanilla extract
3 c. quick or old-fashioned oats
1 2/3 c. (11 oz. pkg.) butterscotch morsels

1. Preheat oven to 375 °F.
2. Combine flour, baking soda, salt, and cinnamon in a small bowl. Beat butter, granulated sugar, brown sugar, eggs, and vanilla in a large mixing bowl. Gradually beat in flour mixture. Stir in oats and morsels.
3. Spread dough into a greased 15 x 10 inch jelly roll pan. Bake for 18-22 minutes or until light brown. Alternatively, drop dough by rounded tablespoons onto a greased cookie sheets and bake for 7-8 minutes for chewy cookies or 9-10 minutes for crisp cookies.
Makes 4 dozen bars or cookies.


Icebox Shortbead - two ways
from Martha Stewart
We have been making the lemon poppy seed variety for years and decided to add the ginger sesame for a different type of Christmas cookie. They were delightful, but if you have never tried to chop crystallized ginger, I will warn you that it is very sticky and may take a few minutes.

1 c. (2 sticks) unsalted butter, room temperature
1 c. confectioner's sugar
1 tsp. vanilla extract
1/2 tsp. salt
2 c. all-purpose four (spooned and leveled), plus more for rolling

Our Mix-Ins and Coatings
for other variations see the original recipe
-Mix in grated zest of 2 lemons; coat with 1/4 c. poppy seeds
-Mix in 1/4 c. finely chopped candied ginger; coat with 1/4 c. sesame seeds

1. With an electric mixer, beat butter, sugar, vanilla, and salt until smooth. With mixer on low speed, add flour, mixing just until a dough forms. Stir in desired mix-ins.
2. Divide dough in half; place each half on a piece of floured waxed or parchment paper. With floured hands, gently roll each into a 1 1/2 inch diameter log. Dividing evenly, sprinkle with desired coating, if using, rolling log (to help coating adhere) and pressing gently. Wrap logs tightly in the paper, and refridgerate until firm, 1-2 1/2 hours. (To store longer, wrap log and paper tightly with plastic wrap.)
3. Preheat oven to 350 °F. Unwrap logs; with a serrated knife, slice dough 3/8 inch thick (if dough crumbles, leave at room temperature 5-10 minutes). Arrange slices, about 1 inch apart, on baking sheets.
4. Bake until lightly golden around the edges, 15-20 minutes. Cool on baking sheets 1-2 minutes; transfer to a wire rack to cool completely.
Makes 3 dozen.


Nutella Cookies
from alpineberry
Oh, man I cannot say enough good things about these ones, the name should really say it all. We tried these for the first time last year, and they are the next best thing to slathering Nutella on a fresh bakery croissant, and are at their best warm, right out of the oven.

1 1/3 c. all-purpose flour
2 Tbsp. unsweetened cocoa
1/2 tsp. ground cinnamon
1/4 tsp. baking powder
1/4 tsp. baking soda
pinch of salt
7 Tbsp. unsalted butter, room temperature
2/3 c. granulated sugar
1/3 c. light brown sugar
2/3 c. Nutella (chocolate hazelnut spread)
1/2 tsp. vanilla extract
1 large egg
1/2 cup semisweet chocolate chips
1/2 cup toasted and skinned hazelnuts, coarsely chopped

1. Preheat oven to 350 °F.
2. Sift together flour, cocoa, cinnamon, baking powder, baking soda and salt. Set aside dry ingredients.
3. Cream together butter, granulated sugar and brown sugar until light and fluffy. Mix in Nutella and vanilla extract. Mix in egg.
4. Add flour mixture and mix until just incorporated. Add chocolate chips and hazelnuts.
5. Drop tablespoons of dough 2 inches apart onto parchment lined baking sheets. Bake for about 11 minutes until the edges look set. Cool on baking sheet for 5 minutes then carefully remove to cooling racks.
Makes 30 cookies.

The Ultimate Heart Smart Chocolate Chip Cookies
by Kelli Gibbs published in the Detroit Free Press
These were a pretty good spin on the traditional chocolate chip, but they did get pretty hard after only a few days.

1/4 c. margarine
1/4 c. (2 oz.) reduced fat cream cheese
3/4 c. packed brown sugar
3/4 c. granulated sugar
1 egg
1 Tbsp. vanilla extract
1 3/4 c. all-purpose flour
1 tsp. baking soda
1/8 tsp. salt
3/4 c. miniature chocolate chips
1/2 c. chopped walnuts (we omitted these)

1. Preheat oven to 375 °F. Line a cookie sheet with parchment paper or coat with cooking spray.
2. In a medium bowl, beat together margarine, cream cheese, brown sugar, granulated sugar, egg and vanilla.
3. In a separate bowl, combine flour, baking soda and salt and stir into sugar mixture. Stir in chocolate chips and walnuts, if using.
4. Drop by rounded tablespoon onto prepared baking sheet. Bake 10-12 minutes, or until edges begin to brown. Cool on wire rack.
Makes 2 dozen.

Here are some tips for cookie mass production that we have learned over the years:
- If you have several recipes that require the dough to be refridgerated make a couple the night before.
- Use parchment paper to line the cookie sheets rather than silicone mats or cooking spray. The later two require some washing in between and can slow you down. Wasteful I know, but it's only once a year and for some of the less greasy cookies, you can flip the paper over and reuse the same sheet.
- Invest in a cookie scoop and a thin, cookie friendly turner.
- Obviously having 2 people to crank it out helps, and so does a KitchenAid, or a few hand mixers with extra beaters.

Other Cookie Day Traditions:
- Eggs for breakfast help to prepare us for the sugar consumption.
- We order fish and chips for dinner and drink iced tea...both are delicious and serve as a vehicle for lemon juice. What else would we do with 4 naked lemons. ;)